Wednesday, March 26, 2014

Tallgeese Titan (TGII) WIP 3

This is WIP 3 of the MG Tallgeese II build. Previous WIPs can be found here:

WIP1
WIP2

Some progress over the past 2 weekends - I finally got the backpack mounted. I wanted to use magnets but ended up going with a couple of screws to secure it to the body.


Click on Read More for the rest of this post!

Monday, March 17, 2014

Tallgeese Titan (TGII) WIP 2

This is WIP 2 for the MG TG 2. WIP 1 can be found here:

WIP 1

I thought a bit of fanfic might help me flesh out the plans for this guy, so in line with the competition theme, I'm imagining this build as a PPSE prototype and predecessor to the Meijin's fielded kits.

   "When PPSE finally got their new Meijin on board, they immediately had him pilot this unit - the Tallgeese Titan - in a series of practice battles. This allowed the development team to collect detailed data on his fighting style. The Meijin found the Titan to be a powerful and versatile machine. He enjoyed having a wide assortment of weapons at his disposal and the ability to detach the heavy armaments made it adaptable to the opponent's tactics. However the tests revealed that the Meijin preferred higher agility straight off the GP base over tough armor. This collaboration lead to the development of the Meijin's first GBWC kit - the Kampfer Amazing."


More after the jump!...

Wednesday, March 5, 2014

Beveling

I recently discovered a bunch of old Japanese videos on YouTube called Plamo Tsukurou - and boy do these guys know their stuff! Each episode shows a plamo master working on a kit from snap build to finish - highlighting their techniques in scratch building, battle damage, painting, weathering and so on. They feature builds from all scale modelling genres.


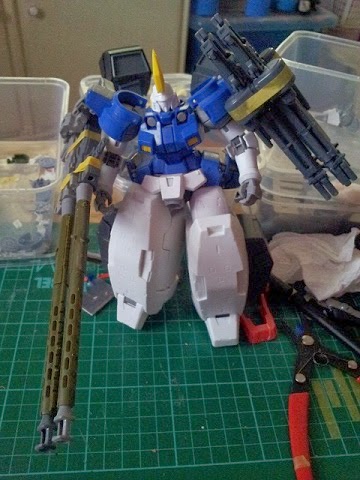
Too bad the videos aren't subtitled, but you do learn a thing or two just by watching them go at it. I've been applying one of the tricks I learned on the TG2, which I will refer to as beveling.

Click on the read more link for the rest of this post...

Tuesday, March 4, 2014

TGII WIP 1

A lot has been going on these past couple of weeks. I've been so busy with work I've had to put extra time in just to meet my deliverables. We celebrated my son's 1st birthday last weekend which I am glad went very smoothly. Can't believe a year has already gone by since he was born...they do grow up fast! As for my hobby, the Templar won top spot in the recently concluded Level Up competition hosted by GundamUK, and I've also been having a somewhat heated "indirect" exchange with another blogger on the issue of bootlegs. While I have better things to do than argue with a self-proclaimed gunpla diety and his so called worshippers, I found it entertaining how we less fortunate knock-off builders were referred to as cheapskate bootleg collectors. Thank you captain obvious!


I'd also like to thank you for frequenting my blog enough and taking the time to update your previous post in response to my latest rant. Now that was funny. I'll be channeling all of this positive energy into my next plamo - the Daban TG2.

More after the jump...

Opening Up Armor Panels

I first saw pictures of how this was done in a Japanese blog and thought I'd do a quick tutorial myself to share with the community. This is probably common knowledge by now, but for what it's worth, here you go...


  • Step 1. Check where you want to open up the armor. Make sure to check for any obstructions on the inside of the part that you don't want to deal with or destroy.